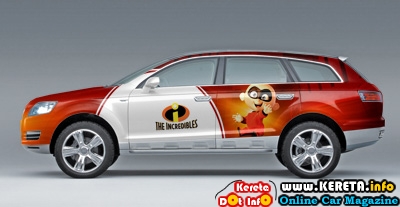
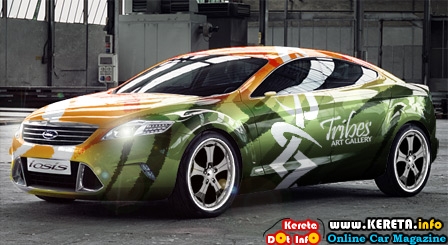
To Design a full body car advertisement is a strange hobby, but it is a fun. Not many people has the capability or skills to do that. For those who really enjoy with this hobby, they really can make or generate some money. It is so easy and you can do that during your free time.
Below are some examples of car advertisement.


Now, we will tell you how to make the car advertisement. So here we go…Enjoy!!
First, You should know the fill commands and basic layer in Photoshop. You can refer to Photoshop manual for any questions.
THE RIGHT BASE COLOUR
It is very important to choose a picture, whether the car has the right colour or not before we can start any project. We want something that is as close as possible to light-gray.
Why do we need to choose the right colour?
The reason is that we need to preserve the light and shadows of the original picture. The areas of shadow of the dark car will be distorted, so that making it very hard to make bright coloured graphics. Similar, a white car will have too many areas of light, making it hard to create dark graphics.
STEP BY STEP – PREPARING THE CAR
First, we need to prepare the car, before we can start adding any graphics. Then adjust the shadows and ligthting, make reflections and a layer for the graphics.
We will start with this:

Select the body of the car – without the headlamps, windows, decals, etc.
With the car selected create two new layers with the content of the selection. But, disable their visibility.

Now we got our foundation and the only left is adjustments. We then need make two major adjustments. The first one being that we make the car white, the second that we create a “reflections” layer.
Re-select the body of the car to make the car white and adjust the brightness levels of the original layer. With white do not mean pure-white, but that the car appears to be painted white.

LIGHT POWER
Here, I want to show the importance of light – in this case the reflection layer. Many people do what we have done so far, and then just added graphics or colours using the “multiply” blending mode.
The result is this. Not interesting colour – the car does not seem to shine.

What is missing is the reflections of light – the most important element when creating realism.
First, change the blending mode to “Screen” to add the reflections turn on the last layer.
Then open “levels” and adjust the darkness of the layer until lightness of the body paint no longer shows.

GRAPHICS
Graphics can be practically anything. You can choose any graphics that you want and like such as movie theme, nature etc. Just change the middle layer (the one called “graphics” to whatever you want – or attach additional layers to it).
Tip: If you want, add two “lens flares” to turn on the headlights.
Tip: Enable “Lock transparent pixels” to lock the layer.
EXAMPLE


Jom komen!